In 2025, A4 thermal paper in Bangladesh has become a crucial item for businesses relying on thermal printers. Prices...
Latest posts
-
 A4 Thermal Paper Price in Bangladesh 2025Read more
 -
 Size of Thermal Printer Paper: A Complete GuideRead more
Discover everything you need to know about thermal printer paper sizes in this comprehensive guide. From standard...
-
 How to Insert POS Paper in Your PrinterRead more
Learn how to insert POS paper into your printer quickly and correctly to avoid jams, misprints, or downtime in your...
-
 Top 5 Mini Printer Prices in Bangladesh 2025Read more
Looking for the best mini printers in Bangladesh for 2025? Our comprehensive guide covers the top 5 mini printers,...
-
 How to Choose the Right Size of POS Thermal Paper RollsRead more
Selecting the right size of POS thermal paper rolls is a simple yet vital decision for your business operations....
-
 Top POS Thermal Paper Brands Trusted by Retailers in 2025Read more
Selecting a trusted POS thermal paper brand is more than just buying paper rolls — it’s about ensuring smooth...
-
 Top Mistakes to Avoid When Buying a POS Receipt PrinterRead more
Choosing the right POS receipt printer is crucial for smooth business operations and a positive customer experience....
-
 How to Choose the Best POS Printer for Your Retail StoreRead more
Choosing the right POS printer is crucial for smooth retail operations and a better customer checkout experience....
-
 Top 5 POS Printers for Small Businesses in 2025Read more
Investing in the right POS printer can streamline your checkout process and enhance customer satisfaction. The Epson...
-
 Best ID Card Printer for Office in 2025Read more
Choosing the right ID card printer boosts your office security and professionalism. The printers listed here are...
Blog categories
Search in blog

How to Setup Zebra Barcode Printer
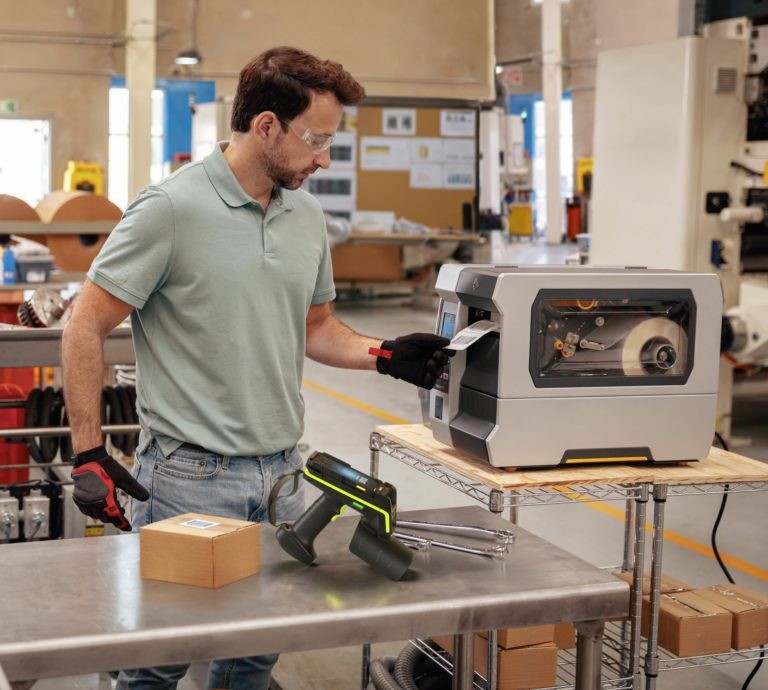
Zebra barcode printers are among the most trusted in the industry — used widely in retail, manufacturing, healthcare, logistics, and warehouse management. If you’ve just purchased a Zebra printer and are wondering how to set it up properly, this guide will walk you through every step of the process — from unboxing to your first label print.
Whether you’re using a model like Zebra GK420d, ZD220, ZT410, or any other, the steps are largely similar. Let’s get started!
? Why Choose Zebra Barcode Printers?
Zebra is known for:
-
✅ Durable build quality
-
✅ High-speed thermal printing
-
✅ Compatibility with most barcode software
-
✅ Reliable performance for bulk label printing
? What You Need Before Setup
Before you begin, make sure you have:
-
?️ Your Zebra barcode printer (e.g., ZD220, GK420d, ZT230, etc.)
-
? Power cable and USB cable (or Ethernet/Wi-Fi depending on model)
-
? Label rolls or thermal paper
-
? A computer with internet access
-
?? Zebra Setup Utilities (download from Zebra’s official website)
⚙️ Step-by-Step Guide: How to Set Up Zebra Barcode Printer
? Step 1: Unbox and Connect the Printer
-
Place the printer on a stable surface.
-
Plug in the power cable and connect the USB or Ethernet cable to your PC.
-
Power on the printer.
Pro Tip: Don’t load labels or connect to software just yet.
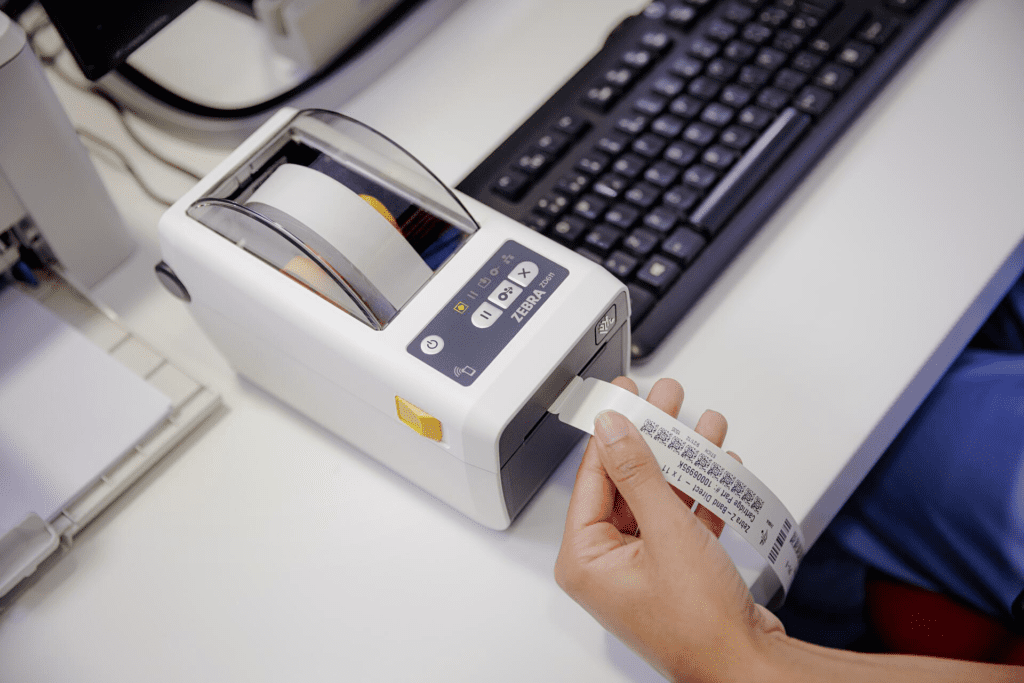
? Step 2: Load the Label Roll
-
Open the printer cover.
-
Place the label roll on the holder.
-
Guide the labels under the sensor and out the front.
-
Adjust the guides to fit the label width.
? Make sure the thermal side of the label is facing up if you're using direct thermal printing.
? Step 3: Install Zebra Printer Drivers
-
Go to Zebra Support
-
Search your model (e.g., ZD220, GK420d)
-
Download and install Zebra Setup Utilities and ZebraDesigner Driver
Once installed, your printer should appear in the system's printer list.
? Step 4: Calibrate the Printer
Calibration ensures the printer reads the label size and gap correctly.
Manual Calibration (button method):
-
Turn off the printer
-
Press and hold the Feed button while turning it on
-
Release when the LED flashes
Or use Zebra Setup Utilities:
-
Open the app
-
Select your printer
-
Click “Calibrate Media” from the tools section
? Step 5: Configure Printer Settings
Use Zebra Setup Utilities to:
-
Set label size and print speed
-
Select print method (thermal transfer or direct thermal)
-
Set darkness level (important for barcode readability)
? Step 6: Test Print a Label
Use any of the following methods:
-
Click Print Test Page in Zebra Setup Utilities
-
Print a sample from your barcode software (like BarTender or ZebraDesigner)
-
Press the Feed button once to advance and check alignment
✅ If the print is clear and well-aligned, your setup is complete!
? Tips for Better Barcode Printing with Zebra
-
Use Zebra-approved labels or BPA-free thermal paper
-
Clean the printhead regularly for better print quality
-
Always check print darkness if barcodes are blurry
-
Use ZebraDesigner or BarTender for advanced label designs
-
Backup your label templates and printer settings
?️ Troubleshooting Common Issues
|
Problem |
Solution |
|
Printer not detected |
Reinstall drivers or try a different USB port |
|
Labels misaligned |
Recalibrate the printer |
|
Faded barcodes |
Increase print darkness or replace label roll |
|
Skipping labels |
Check label gap settings and sensors |
? Where to Download Zebra Software
-
Zebra Setup Utilities:
https://www.zebra.com/us/en/support-downloads/printer-software/zebra-setup-utilities.html -
ZebraDesigner:
https://www.zebra.com/us/en/products/software/barcode-printers/zebradesigner.html
? Final Thoughts
Setting up a Zebra barcode printer doesn’t have to be intimidating. With the right tools, drivers, and a bit of calibration, you can be printing professional barcode labels in minutes. Whether you’re using a Zebra ZD220 for your retail store or a ZT410 for industrial use, following these steps will ensure reliable, high-quality printing every time.
Posted in:
Printer and Accessories
Related posts
-
 Industrial Printers For Top-Level Performance
Durable industrial printers are ideal for high-volume barcode and RFID label printing in manufacturing and warehouse...Read more
Industrial Printers For Top-Level Performance
Durable industrial printers are ideal for high-volume barcode and RFID label printing in manufacturing and warehouse...Read more -
 Find the Barcode Wristbands You Need
Selecting the proper wristbands for healthcare, event management, and more.Read more
Find the Barcode Wristbands You Need
Selecting the proper wristbands for healthcare, event management, and more.Read more -
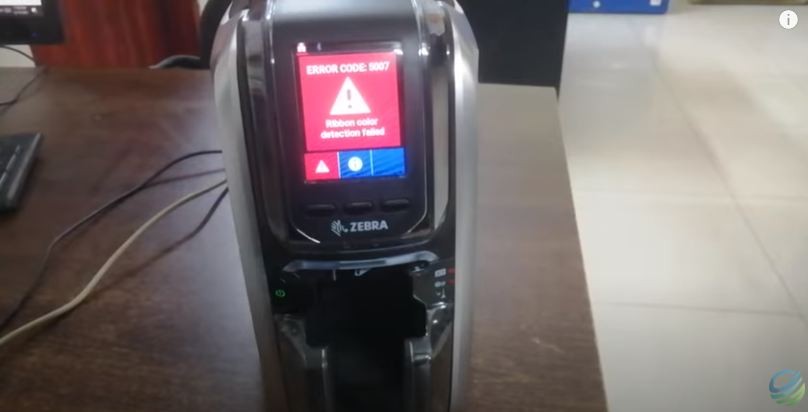 Zebra ZC300 Ribbon Color Detection Failed 5007
Calibrating Ribbon Errors on ZC100 and ZC300 Series Card Printers: Issue / Question: • Error Code: 5001- Out of...Read more
Zebra ZC300 Ribbon Color Detection Failed 5007
Calibrating Ribbon Errors on ZC100 and ZC300 Series Card Printers: Issue / Question: • Error Code: 5001- Out of...Read more -
 Hiti CS200e ID Card Printer Installation
Hiti CS200e New Printer Installation & Tutorial: * Ribbon Install, Card Load & Sample PrintRead more
Hiti CS200e ID Card Printer Installation
Hiti CS200e New Printer Installation & Tutorial: * Ribbon Install, Card Load & Sample PrintRead more -
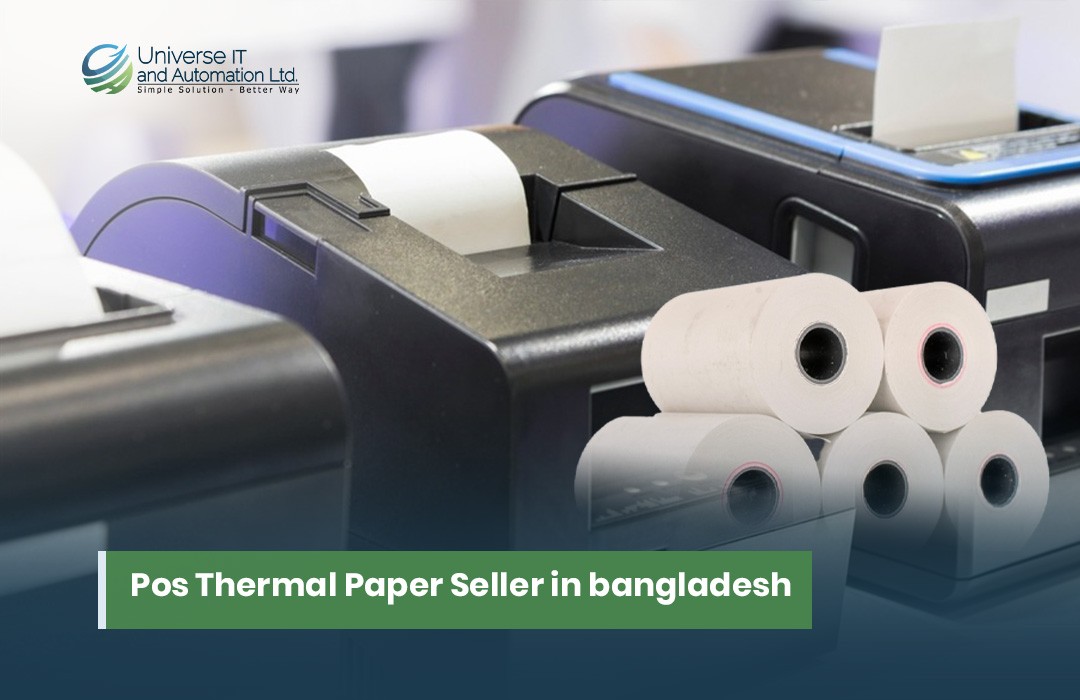 Pos Thermal Paper Seller in bangladesh
POS (Point of Sale) thermal paper rolls are essential consumables for businesses like retail stores, pharmacies,...Read more
Pos Thermal Paper Seller in bangladesh
POS (Point of Sale) thermal paper rolls are essential consumables for businesses like retail stores, pharmacies,...Read more
Leave a comment